Marble Solitaire Solutions That Actually Work
By Rajat Agarwal, Founder of Play Solitaire Gaming
Discover practical marble solitaire solutions with step-by-step moves, smart strategies, and drills to help you clear the board and land on one final peg.
You're at the board with four pegs left, and nothing obvious lines up. One more move seems to help, then the position freezes again, and the temptation to blame the layout is real. Most of the time, though, the problem started much earlier, with a move that looked harmless and stole your last chance to finish cleanly.
That's why marble solitaire solutions reward planning more than guessing. The ending is usually decided by the middle, and the middle is decided by the opening. If you learn to read the board a little earlier, the final few pegs stop feeling mysterious and start feeling manageable.
Table of Contents
- The Four Pegs Left and No Good Move
- How the English 33-Hole Board Works
- A Complete Worked Solution You Can Follow
- Smart Strategies That Beat Random Guessing
- Unsticking Common Dead-End Positions
- Practice Drills to Sharpen Your Next Run
The Four Pegs Left and No Good Move
The stuck ending that frustrates most beginners is simple to describe. You've got four pegs scattered around the board, no clean jump in sight, and every legal move seems to make the position worse. That moment doesn't mean the game is broken, it means the plan was off by a move or two somewhere back in the run.
A useful way to think about it is this. The final four pegs are rarely decided at the final four pegs. They're usually set up by choices made several jumps earlier, when the board still looked busy and forgiving. A peg left on the wrong rim, or a jump that opens the center too late, can turn the endgame into a dead stop.
Practical rule: if the board feels cramped at the end, look backward for the move that stranded a peg on the edge.
That's the promise of this guide, a small checklist that helps you avoid the same trap on your next attempt. One thread is geometry, because the English board has a shape that rewards certain lanes. Another is a worked solution, so you can see the rhythm of a winning run. The third is a set of habits you can reuse when the board starts to drift off course. For a related look at solvability questions, see the discussion of winnable percentage.
Why the ending feels impossible
A beginner usually notices the last four pegs and assumes the puzzle has turned random. It hasn't. The board has reached a point where every remaining jump has to preserve future mobility, and that takes earlier discipline. If you want the endgame to open cleanly, you have to protect at least one route for a later chain, not just take the first jump that appears.
That's why so many close losses look similar. A peg gets removed too early from the perimeter, the center becomes too crowded or too empty at the wrong time, and the last cluster has no bridge left. Once you start spotting that pattern, the ending stops looking like bad luck and starts looking like a readable shape.
How the English 33-Hole Board Works
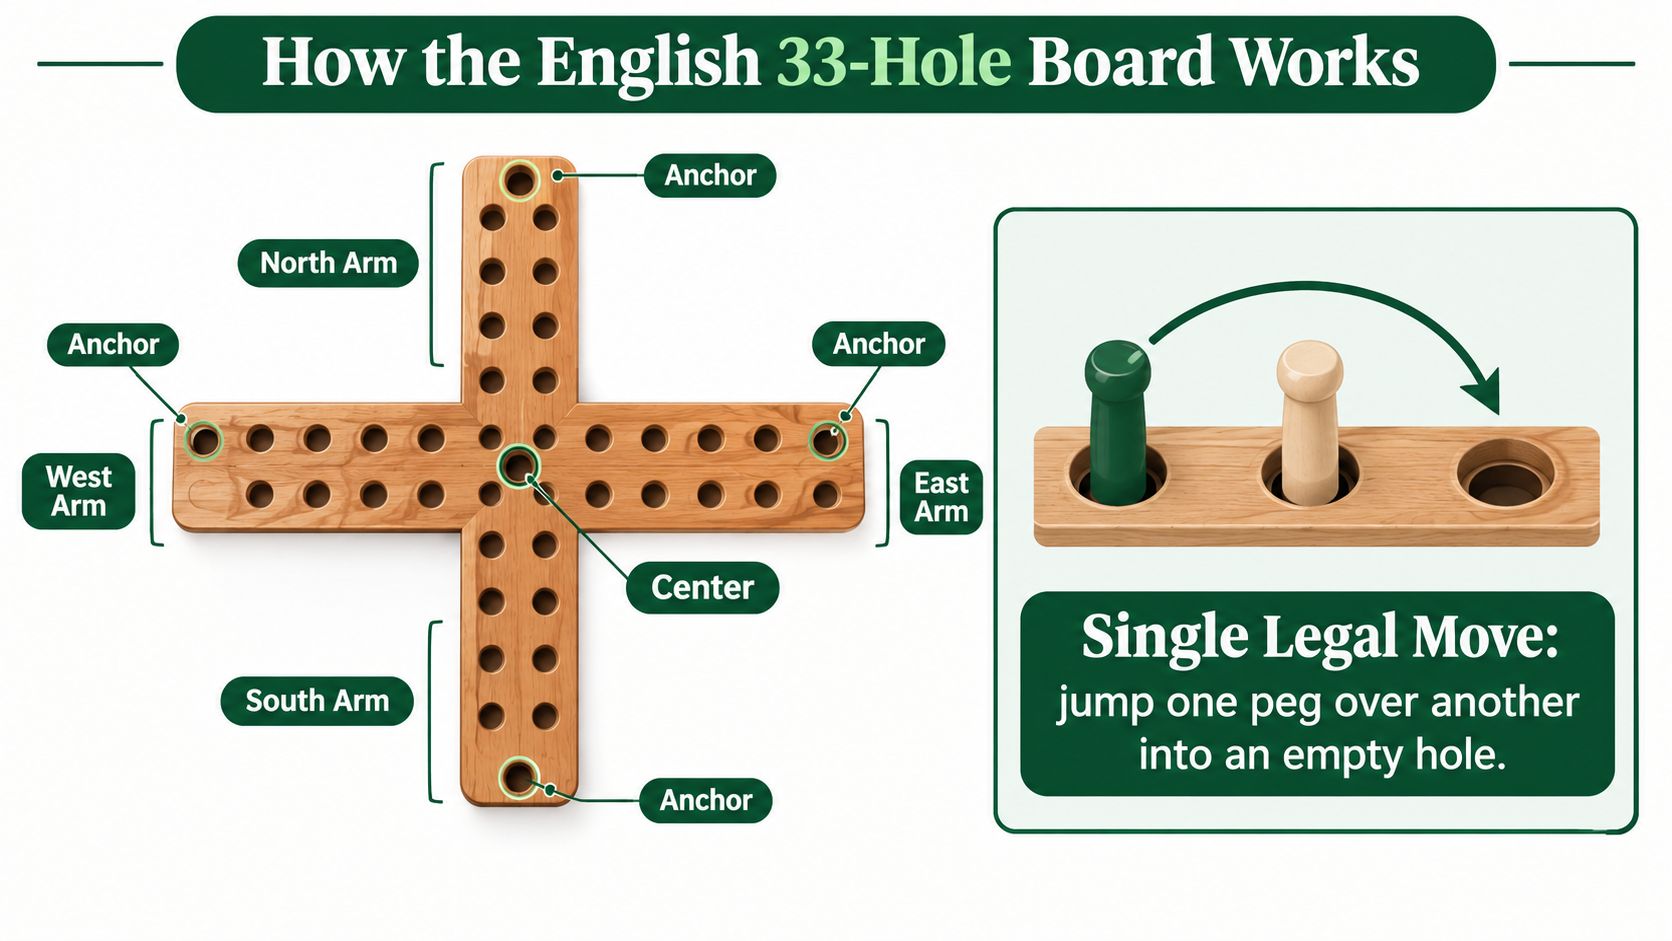
The English board is the classic 33-hole cross shape. The center sits in the middle, with four arms extending north, south, east, and west. The outer holes at the ends and corners work like landmarks, because they show where clusters are forming and where mobility is starting to disappear.
The rule is narrow on purpose. A peg jumps horizontally or vertically over an adjacent peg into an empty hole, and the jumped peg is removed. Diagonal jumps are illegal, so a line must run straight across a row or column to count. That simple rule creates the whole puzzle.
The standard start fills 32 holes with pegs and leaves the center empty. The goal is to finish with exactly one peg left on the board. On the standard English board, the optimal solution uses 18 moves when multi-jump sequences are counted as single moves, as noted in the board's solution history and later proof of minimality Marble Solitaire history and optimal solution. Since each legal jump removes one peg, a perfect run on the standard board requires 31 jumps in total peg count and final-jump count.
The board looks simple because it has one rule. The challenge comes from where each jump leaves the next peg.
What the board shape changes
The English board is a cross with narrow lanes and tight corners. That shape creates pressure points, especially near the center and along the arms. If you learn which lanes keep your options open, the board becomes easier to read.
Name the parts in your head as you play. The center works like a traffic circle. The arms are the roads in and out. The corners are where pegs get stranded if you rush. Once those landmarks feel familiar, a move that looks harmless on one side can ruin a different side three turns later.
A useful five-minute drill is to trace one legal jump at a time and ask one question before each move, does this peg help keep the board connected, or does it leave an isolated pocket behind? That habit trains your eye to spot dead ends before they settle in.
A Complete Worked Solution You Can Follow
A full winning run on the English board does not need to feel mysterious. It helps to treat it like a chain of small decisions, where one good jump opens the next. The board rewards moves that keep options alive, not moves that merely remove a peg.
Start with the empty center as your target lane. On a real board, the early jumps that matter most pull pegs inward and keep the arms connected. The exact legal move depends on the position in front of you, but the pattern stays steady. You want the board to remain flexible, not stretched thin along the edges.
Opening the center lane
The first useful jump is usually the one that sets up another jump soon after. A beginner often chooses a tidy corner move because it looks safe, but that can leave the next area cramped. If a move does not help another peg travel farther on the following turn, it is usually the weaker choice.
A small drill helps here. Before each move, ask whether the jump keeps the board connected or leaves a pocket behind. That quick check trains your eye to spot dead ends before they settle in.
Building a middle chain
Once the center starts to open and close in the right pattern, the board begins to behave like linked steps rather than scattered pegs. At that stage, the middle matters more than the corners. You are trying to preserve one connected path that can keep feeding pegs toward the final remaining arm.
A good worked solution follows that logic. It shifts traffic from one arm to the next, avoids overcrowding the center, and leaves one peg available for a later escape. You do not need to memorize a rigid script to understand why the run works. You do need to see whether a move creates future mobility or spends it too early.
For a clear move-by-move reference, the solitaire marble game solution walkthrough is most useful when you compare each jump to the board shape, not just to the next capture.
Finishing the last peg cleanly
By the end of a successful run, the remaining pegs should funnel into a controlled finish rather than a scramble. The last peg can land in different places depending on the route you used, but the standard English board still has an optimal solution with 18 moves Marble Solitaire history and optimal solution. That matters because it shows the puzzle has a minimal answer, not a loose collection of lucky paths.
A useful five-minute practice run is to replay a winning sequence and pause before every jump. Name the purpose of that move in plain language. Does it open the center, keep an arm connected, or preserve a later chain? That habit turns a solved example into a skill you can reuse.
If your run is still alive near the end, the best question is simple, which move preserves a later chain? That single habit separates a win from a board that looks close but never quite lands.
Smart Strategies That Beat Random Guessing
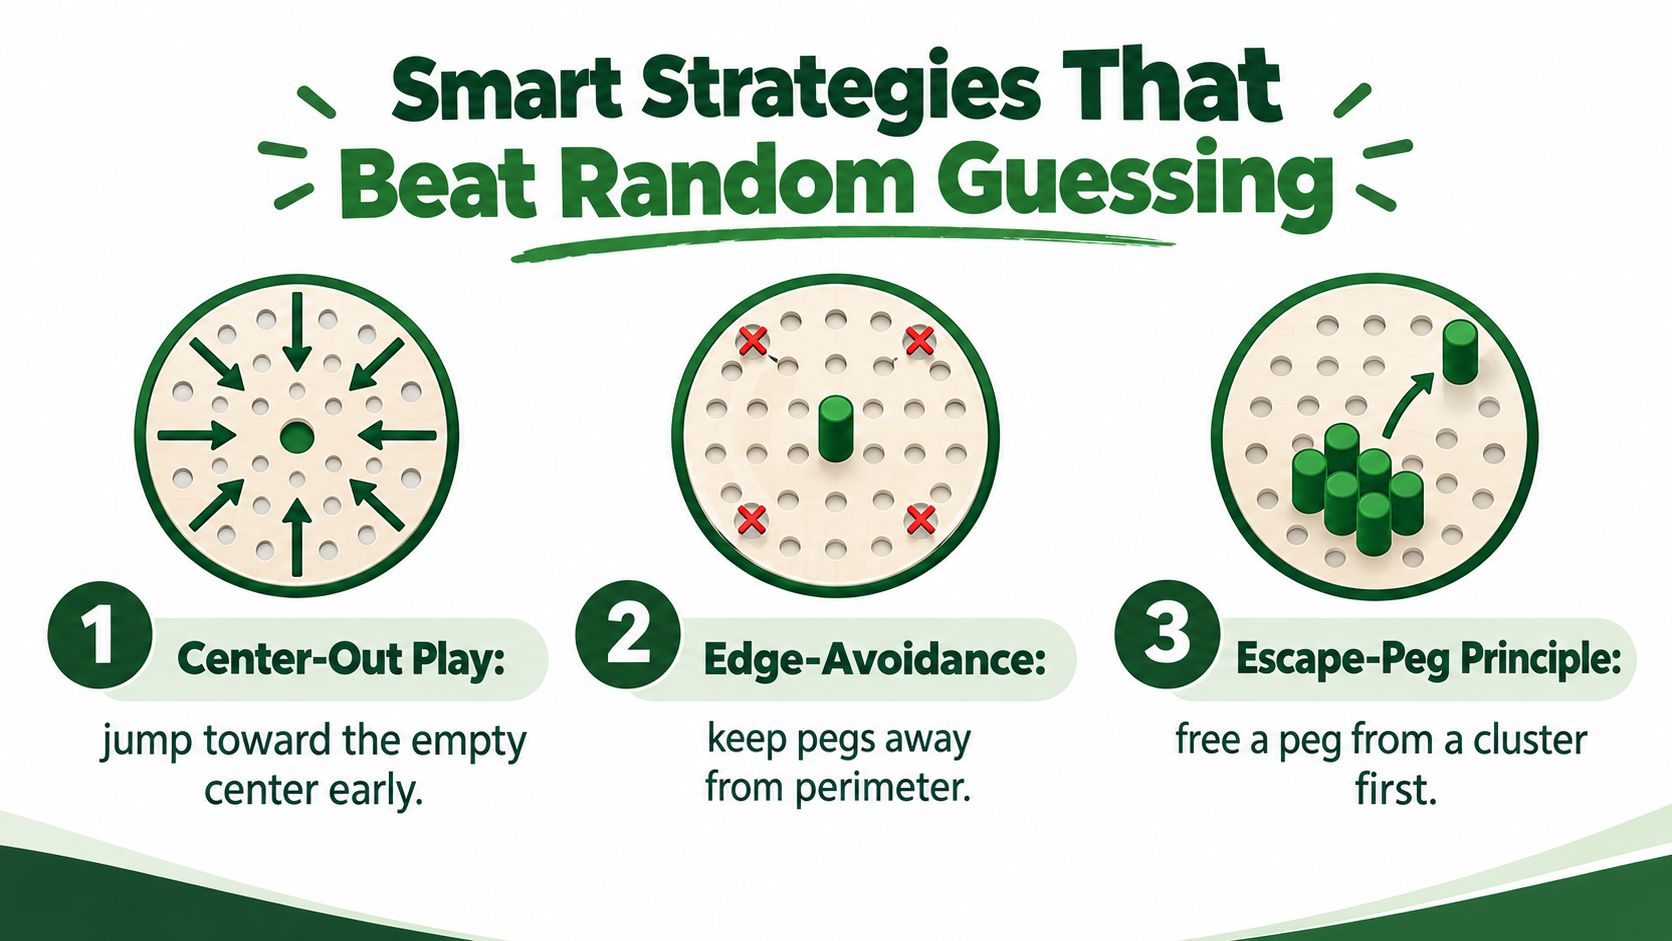
The strongest marble solitaire solutions usually follow three habits. They are simple, but they keep the board alive long enough for a finish. Treat these as board-reading rules rather than tricks.
Center-out play beats edge snatching
The center is where your best follow-up options live. Early jumps that move into or through the center usually create more next-turn choices than jumps that peel pegs away from the outside. A rim move can look tidy, but if it leaves the middle untouched, the board often stays split apart.
A common beginner mistake is taking a corner jump too early. It feels like progress because a peg disappears, yet the remaining pegs become harder to connect. If the board is still open, ask whether the jump sends traffic toward the center or clears space at the edge.
Edge-avoidance keeps the board flexible
Edges are where pegs go to die if you are careless. A peg stranded on the perimeter often has only one useful line, and sometimes none. Keeping pieces away from the rim for as long as possible gives you more routes when the board tightens later.
Here is the practical rule. If two legal jumps are available and one leaves a peg on the edge while the other keeps it in the center lane, choose the center lane unless the board shape clearly argues otherwise. That habit saves a surprising number of losing positions.
Leave one escape peg
A strong run usually keeps one peg available as a bridge out of a cluster. Remove that peg too early, and the remaining pieces may have no way to turn a dead end into a chain. The idea matters most when the board has thinned to a few small groups.
Takeaway: do not just ask what disappears, ask what stays available for the next two turns.
A useful five-minute drill is to set up any mini-position where two pegs sit on the rim and three sit in the center. Try the rim peg first, then reset and leave it alone a little longer. You will see how quickly one choice cuts off the ladder you needed for later moves. For a clearer explanation of why that pattern matters, the mathematics of solitaire helps show why careful pruning beats random jumps.
Unsticking Common Dead-End Positions
Dead ends usually arrive in familiar shapes. Once you can name the shape, the fix gets easier to see. The board stops feeling like a mystery and starts looking like a pattern you've seen before.
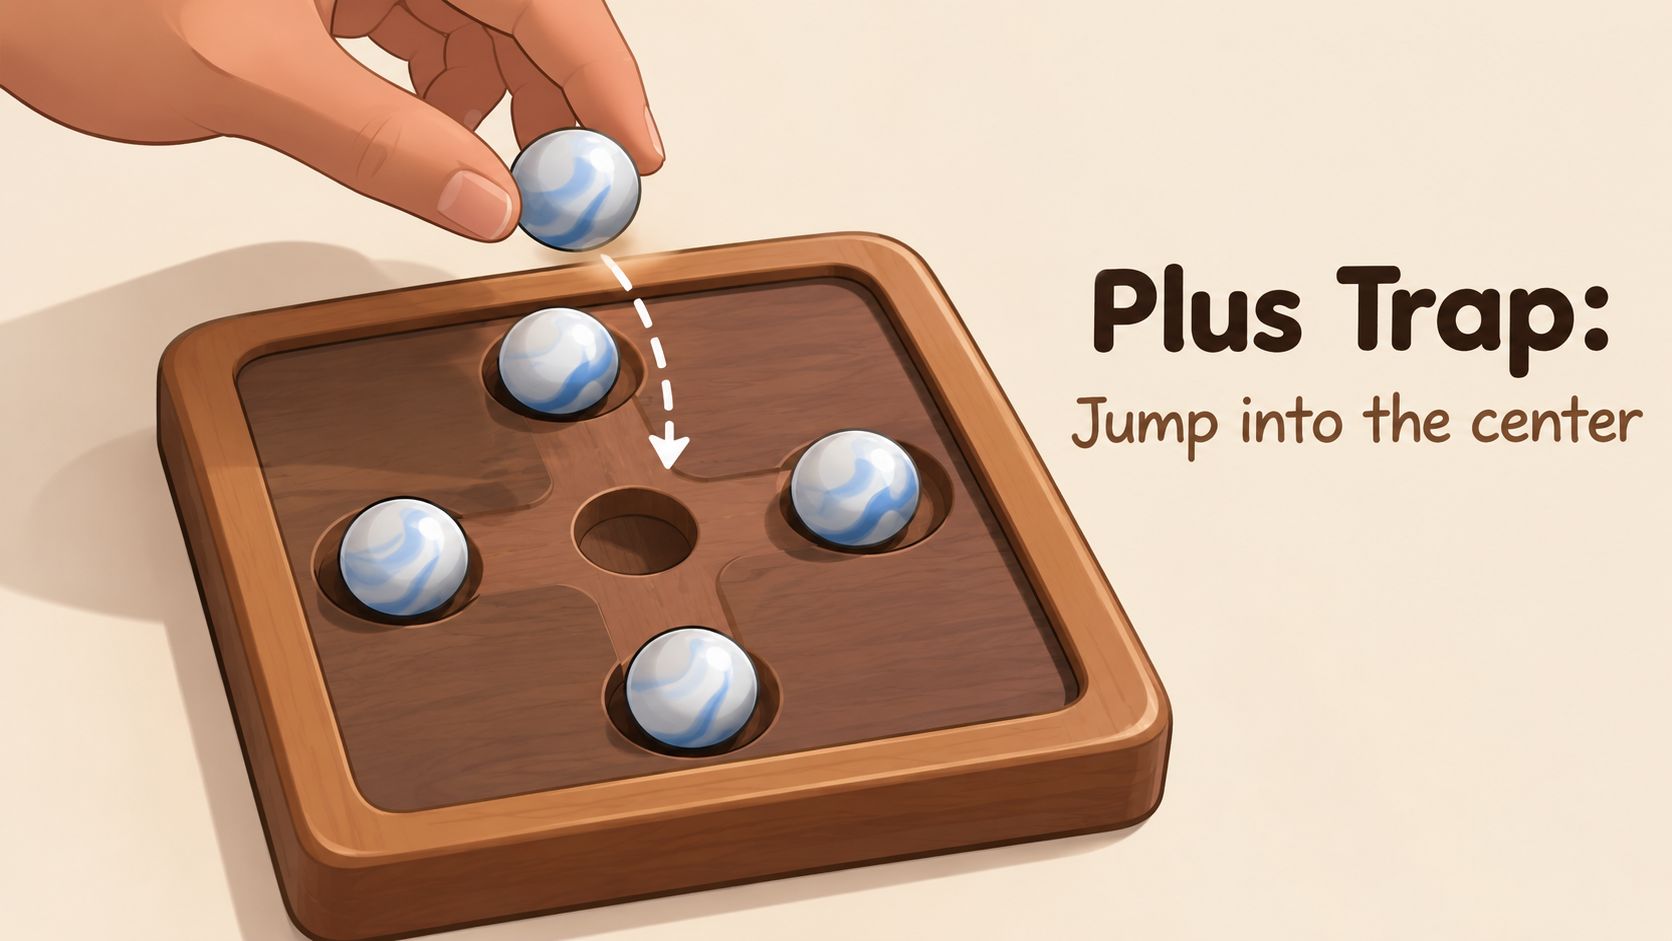
A classic trap is the plus-shaped cluster with the empty spot stuck in the dead arm. The obvious jump often keeps the cluster facing the wrong direction, while the better move is the side jump that rotates the group toward an open edge. That side jump looks less direct, but it usually preserves future travel for the next two pegs.
Another common failure is the triangle pressed against the rim. Players want to remove the front peg immediately, but that often isolates the last one. The stronger move is the retreat jump, the one that feels backward for a moment and then gives the board room to breathe.
Read the shape before you move
The hardest dead end is the two-peg split across the board. The obvious jump seems natural, but it can trap both pegs by cutting off the only lane that still connects them. The win usually depends on preserving the line that lets one peg reach the other side later, not on taking the first available capture.
That's where parity thinking helps, even if you don't want to call it math. If a jump breaks the board into pieces that can no longer talk to each other, stop and look for the move that keeps one bridge intact. The right move may be less flashy, but it keeps the game winnable.
If you've been stuck on the same near-end shape more than once, that's good news. It means your board is teaching you a repeatable lesson, not punishing you at random. The next time that shape appears, don't stare at the remaining pegs first, stare at the line that still connects them.
Practice Drills to Sharpen Your Next Run
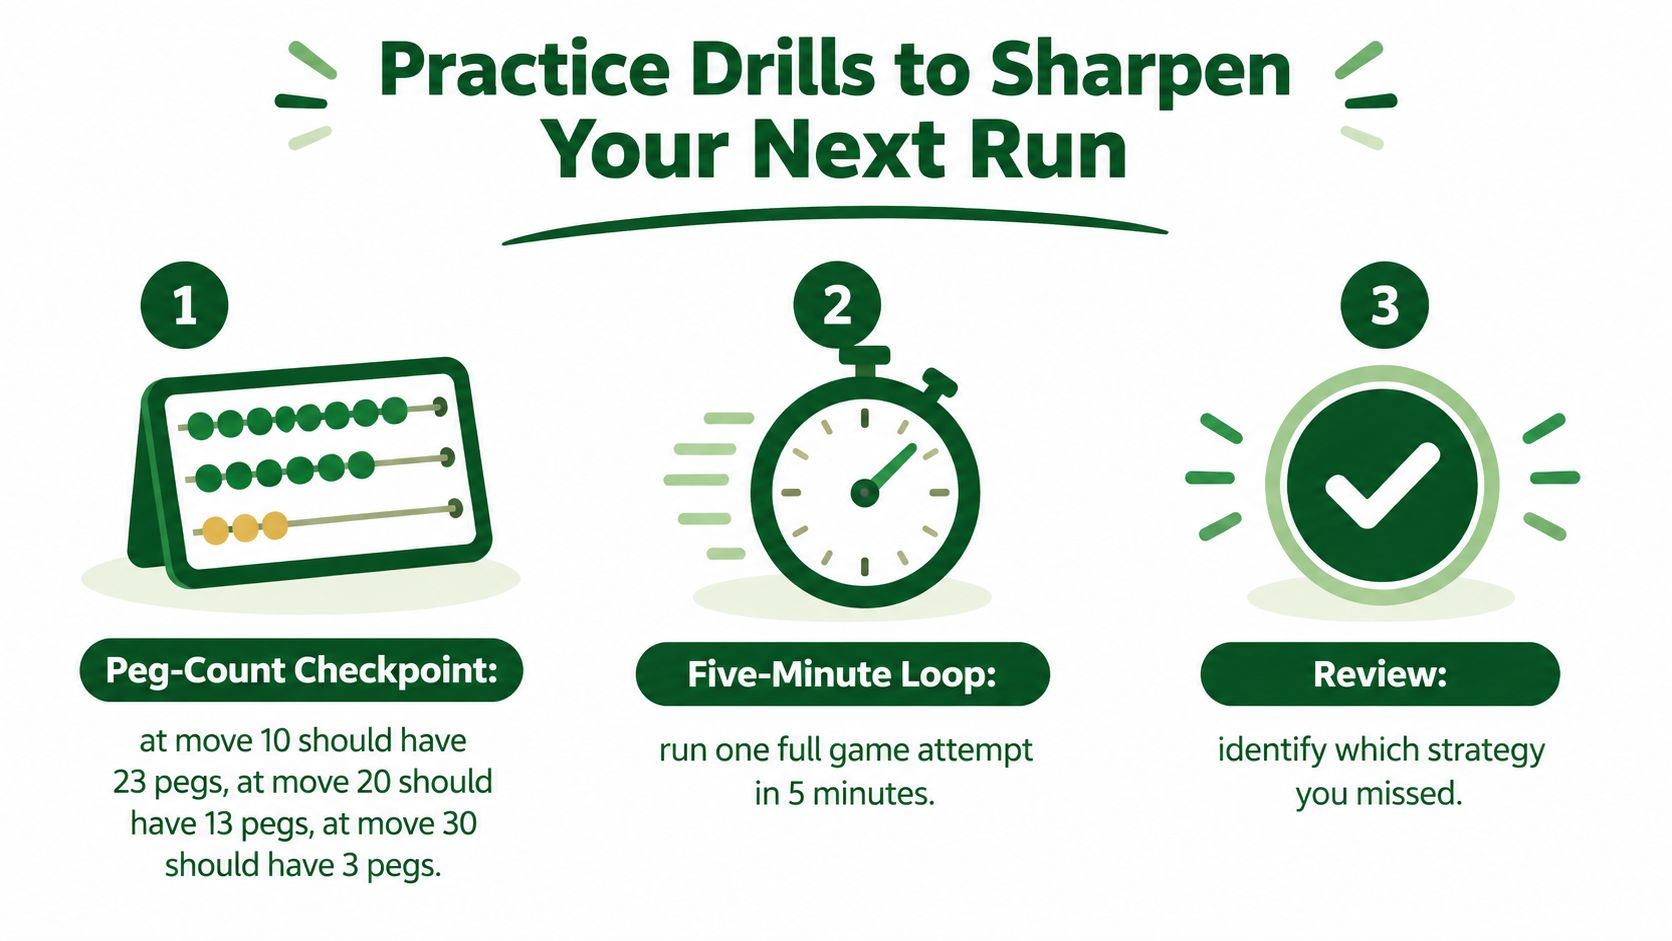
A five-minute practice loop works better than a long, unfocused session. The point isn't to finish every board, it's to notice mistakes sooner and learn the shapes that keep repeating. That's how the game starts feeling less random.
Count pegs at checkpoints
Use a peg-count checkpoint at move 10, move 20, and move 30. If your count is off, the run is already drifting, and you should study the earlier jumps instead of hoping the ending will fix itself. That habit gives you an early warning before the board turns hopeless.
Reset fast after a loss
After a loss, start a new game immediately. Don't sit on the failed position and overthink it. Fast resets train pattern speed, which matters because the board rewards recognition, not hesitation.
Replay the last three moves
When a board fails, walk backward through the last three moves and find the first bad choice. The final move usually isn't the mistake. The earliest poor decision is the one that closed the future lane.
A simple log helps too. Write the date, your opening jump, your final peg count, and one sentence about what you'll change next time. If you want more guided solving habits, the how to win solitaire expert tips page fits nicely alongside this kind of drill-based practice.
Keep the log short enough that you'll actually use it again tomorrow.
Play Solitaire Gaming offers free browser play across several solitaire variants, so it's easy to practice planning without installing anything. If you want a distraction-free place to keep working on pattern recognition and careful sequencing, visit Play Solitaire Gaming and use the same patient approach you'd bring to a tough marble solitaire board.
Ready to play?