Solitaire Marble Game Solution: Complete Move Guide
By Rajat Agarwal, Founder of Play Solitaire Gaming
Master the solitaire marble game solution with step-by-step move sequences, board variant tips, and strategies to finish with one marble in the center hole.
You've probably had one of those runs where the board looks promising, then suddenly you're left with a lonely marble and nowhere to go. Or maybe you finished with one marble left and still wondered, “Did I solve it right?” That confusion is common, because solitaire marble game solution pages often blur together a basic win, a perfect win, and a move count that depends on how the jumps are counted.
Table of Contents
- Understanding What a Complete Solution Looks Like
- Setting Up the Board and Learning Jump Mechanics
- Walking Through a Complete 31-Move Solution
- Strategic Principles That Prevent Dead Ends
- Adapting Solutions for Different Board Variants
- Troubleshooting Common Stuck Positions
Understanding What a Complete Solution Looks Like
The cleanest way to think about this puzzle is simple, even if the search results around it are not. A complete solution means you end with one marble left anywhere on the board. A perfect solution is stricter, because that last marble must land in the center hole, the same place the game started empty. That distinction matters, because plenty of players think they failed when they reached the standard win condition.
The move count causes even more confusion. On the standard 33-hole English board, a full win means going from 32 marbles to 1, so you make 31 jumps in total, as noted in the standard rules summary from Jaques of London's peg solitaire guide and the board summary at Games Rules. Some tutorials describe the same winning path as 18 moves because they count a chained set of jumps as one move, while others count every jump separately. Both can be talking about the same solve, just with different bookkeeping.
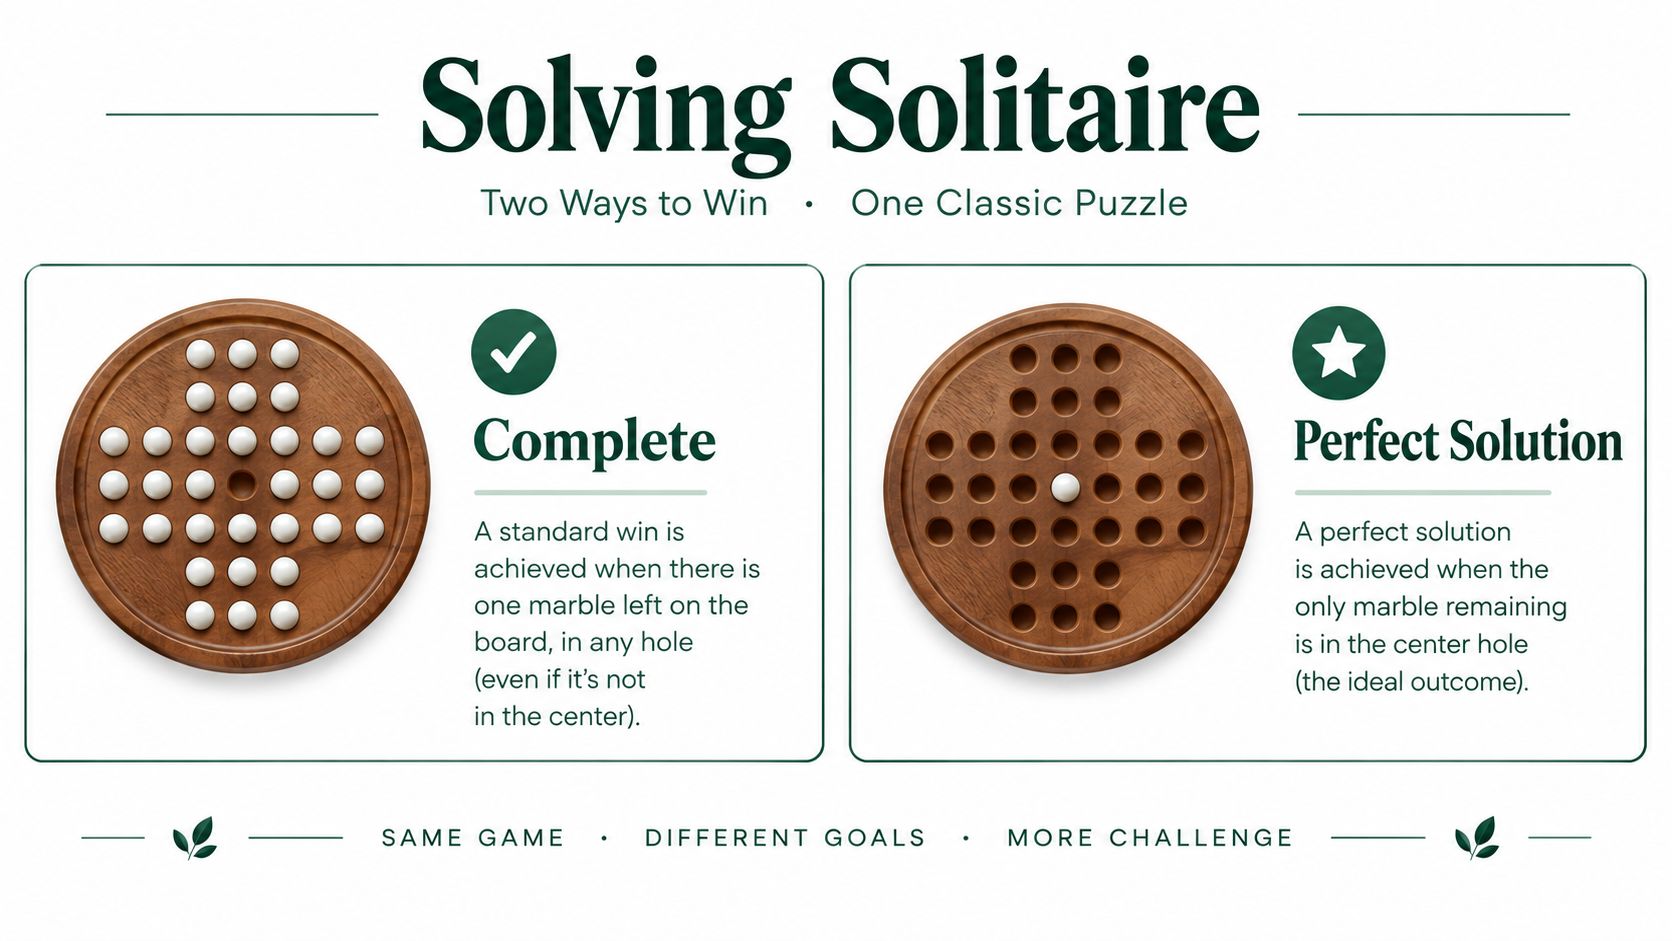
Practical rule: if the board ends with one marble, you've solved it. If that marble is in the center, you've solved it perfectly.
A lot of the frustration comes from tutorials that never say which finish they mean. One page may show a tidy ending and call it success, while another insists the center hole is the only real target. That's why it helps to separate the goal, the move count, and the board geometry before trying to copy any walkthrough. The full picture is also easier to compare if you keep one reference open, such as the overview of different solitaire game types.
Setting Up the Board and Learning Jump Mechanics
The classic board is a cross-shaped layout with 33 holes. You begin with every hole filled except the center, so the game starts with 32 marbles on the board. That empty center spot is what gives the first jump its room to happen, and it's why the opening is never random. On the first turn, only the marbles sitting directly above, below, left, and right of the center can move inward.
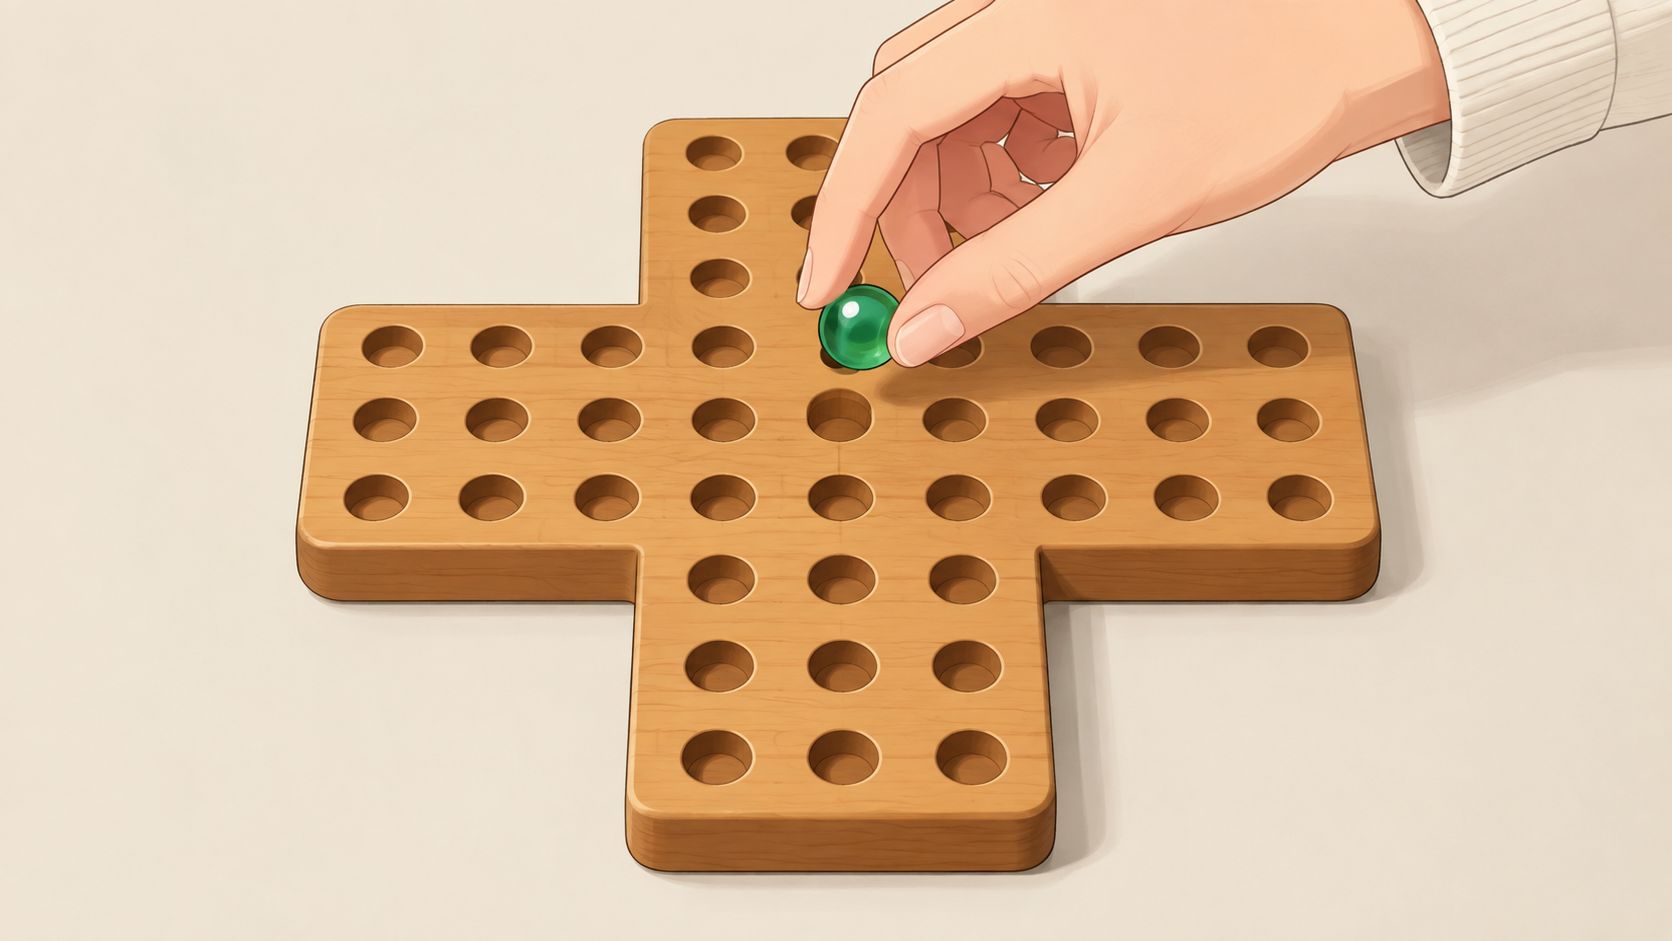
A legal jump is always straight, never diagonal. One marble jumps over exactly one adjacent marble into an empty hole immediately beyond it, and the jumped marble is removed. That means every valid move involves three holes in a line, a marble, a marble to capture, and a landing space. If any part of that line breaks the pattern, the move isn't legal.
The opening is where people often go wrong because they move a marble that looks close enough. It isn't enough for a marble to be “near” the center. The destination hole must be empty, the jumped marble must sit between the start and landing holes, and the line must be horizontal or vertical.
If you want a stable opening, don't chase the middle blindly. Start by noticing which jump creates a board that still has connected marbles around the edges, because isolated pieces are much harder to use later. That principle shows up again and again in the standard solution logic, and it's why the first few jumps matter more than they look.
A useful shortcut is to think in terms of connected clusters rather than single pieces. When marbles stay near one another, they can keep feeding future jumps. When one gets stranded alone on an arm, the board often starts to collapse into dead ends. For a broader comparison with card solitaire, the board-game rules differ sharply from Klondike solitaire play, even though both use the same familiar “solitaire” label.
Walking Through a Complete 31-Move Solution
A clean 31-jump solve is easier to follow if you treat it as a chain of moves that steadily clears the arms while protecting the center. The standard English board often uses the center-hole finish as the target, but some writeups count moves differently, so the same solution can look “off by one” depending on whether a source counts jumps or marbles removed.
On the standard board, one common opening line is d6-f6, f6-f4, e4-g4. That sequence does a simple job: it pulls pieces out of the top and right side without breaking the board into disconnected scraps. If you are new to notation, read each move as start, jump, finish. The jumped marble is removed every time.
The solution video below shows one such path on the standard board.
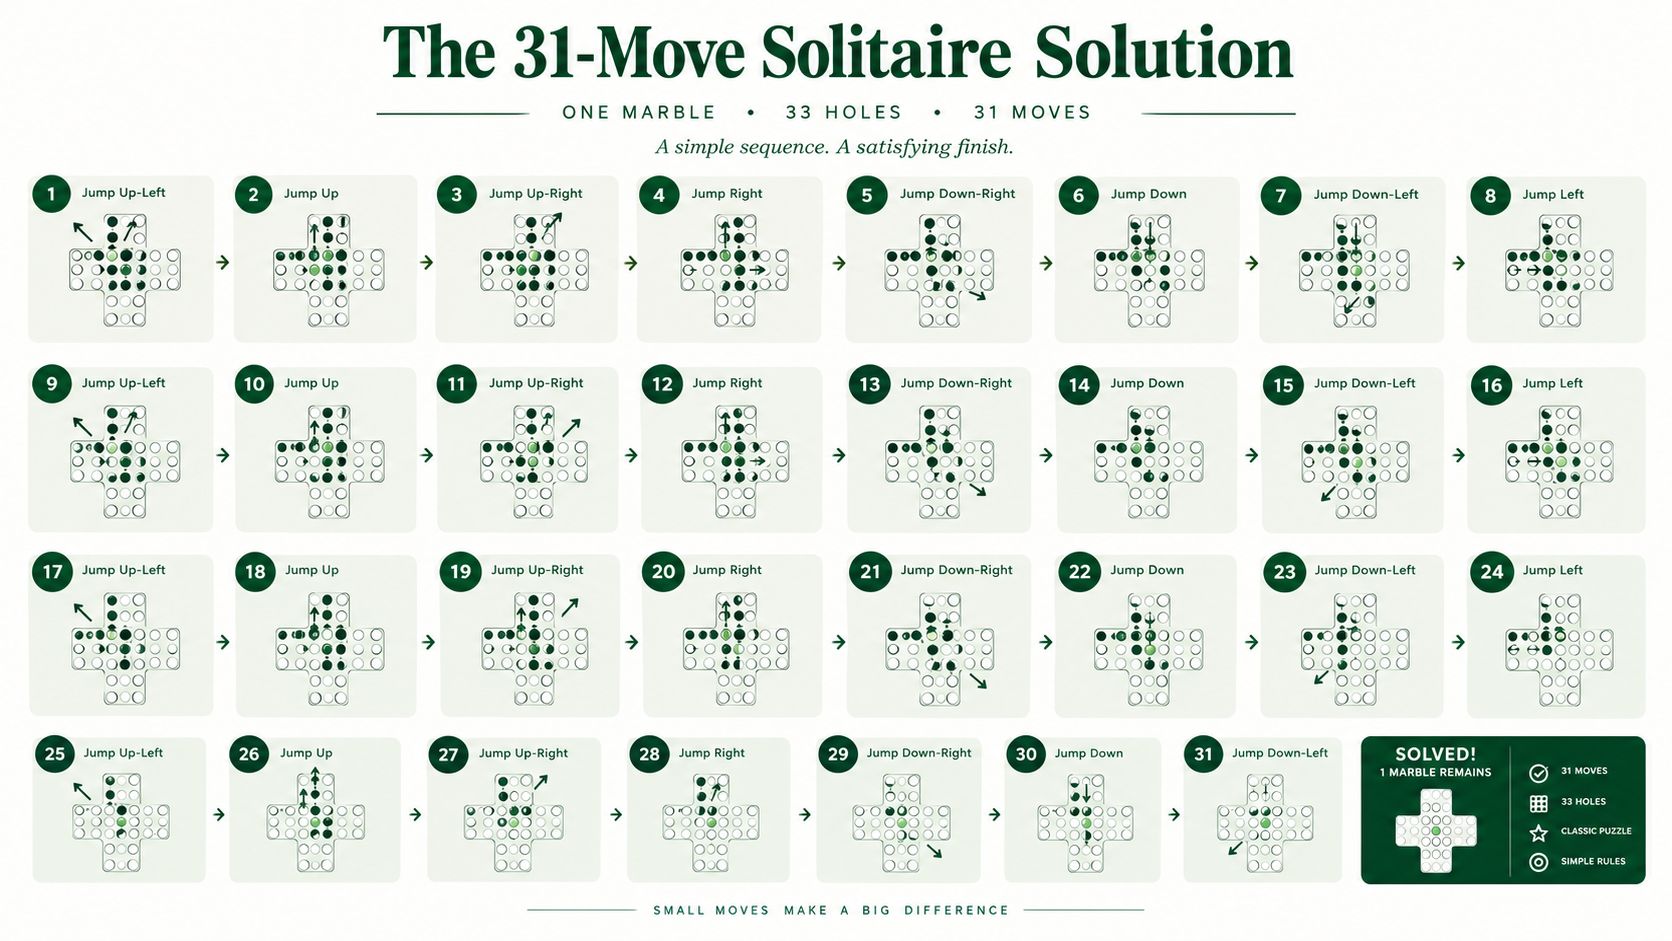
Checkpoint thinking: after the early jumps, you should still see at least one active lane on more than one arm of the cross. If the board starts looking like a single stranded chain too soon, the finish usually gets messy.
From there, the rest of the sequence works because each move creates the next landing space. That is the part beginners often miss. A move list is not just a list, it is a chain reaction. One jump opens a hole, that hole supports the next capture, and the board shrinks in a controlled way instead of collapsing at random.
A few turns matter more than they first appear. If you clear the center too early, the last few marbles have nowhere useful to go. If you leave one arm crowded for too long, it tends to trap a lonely piece near the end. A good solve keeps those two risks in balance.
The most reliable way to follow any complete path is to pause at each checkpoint and ask two questions. First, does the board still have at least one workable capture chain? Second, are you still aiming toward a finish that leaves the last marble in the center hole? That is the difference between copying a move sequence and understanding why it succeeds.
Strategic Principles That Prevent Dead Ends
A strong finish starts with one habit, don't isolate marbles. A marble sitting alone at the tip of an arm usually can't be removed because it has no neighbor to jump over and no landing hole beyond that neighbor. Once that happens, the board may still have legal moves elsewhere, but the stranded piece is often permanent. That's why the best players keep the board connected as long as they can.
The second habit is to think in small packages. Instead of scattering jumps everywhere, clear sections in groups so the board stays compact enough to support future moves. The board likes symmetry early on, because mirrored positions tend to preserve options on both sides of the cross. As the game narrows, you can break symmetry on purpose, but you want that to happen because of a plan, not because you ran out of ideas.
Patterns that usually cause trouble
- Corner traps: a marble parked in a corner of an arm can become unreachable once the surrounding lane opens too wide.
- Isolated pairs: two marbles alone don't help if neither has a jumpable neighbor in the right line.
- Thin center clusters: if the center empties too quickly, the last few jumps may run out of landing spaces before the board is reduced cleanly.
Those patterns matter because they often look harmless one move before the failure. A board can seem active right up until the moment it isn't. That's why strong solvers count not just the next jump, but the next shape the board will have after that jump.
A useful mental test is to look three moves ahead, not one. If a jump leaves you with a lone marble that can't be supported by the remaining cluster, back up and choose a different route. That kind of thinking is exactly what makes peg solitaire feel like a logic puzzle rather than a mechanical capture game. For a common mistake checklist, the peg solitaire mistake guide is a good companion reference.
The board rewards restraint. A flashy jump that opens the wrong lane is worse than a quiet move that keeps your last three marbles connected.
Adapting Solutions for Different Board Variants
Not every marble solitaire board behaves like the classic English cross. The 33-hole English board, the 37-hole European board, the 45-hole Wiegleb board, and triangular layouts all change the puzzle's shape, even when the jumping rule still feels familiar. A move that helps on one board can fail on another because the geometry changes which pieces can support each other. The board size matters as much as the marbles themselves.
The English board is the one most commonly pictured first, but it's only one version of the game. The European board adds filled corners to the cross, which alters how the outer arms interact. The Wiegleb layout gives even more room and therefore more branching possibilities, while triangular boards change the whole idea of “arms” into layered rows. If you copy a solution without matching the board type, the path will break.
That's why online tutorials can look convincing and still be wrong for your board. They may show a valid finish on a different geometry, or they may assume a different starting hole. The difference between a standard finish and a perfect center finish also matters here, because some variants have a clear central target while others make the notion of “center” more ambiguous in practice. A deeper mathematical comparison is discussed in this solitaire mathematics guide.
The safest way to compare variants is by asking three questions before you copy any move sequence.
- Which board shape is this? Cross, octagon-like, or triangle.
- Which hole started empty? Center, corner-adjacent, or another designated start.
- What counts as success here? One marble anywhere, or one marble in a specific target hole.
That little checklist prevents most false starts. It also explains why a walkthrough for one board can't always be “translated” by eye into another. The underlying logic is similar, but the move order, the opening lane, and the final landing spot all change with the geometry.
Troubleshooting Common Stuck Positions
When a game goes bad, it usually fails in a familiar way. You end up with a few marbles left, but no legal jumps remain because the remaining pieces are spread too thin. That doesn't mean the puzzle was impossible from the start, only that one of the early decisions broke the board into parts that no longer support one another. The failure often shows up first as a marble marooned at the end of an arm.
The hardest stuck positions are the ones that still look active. You might have an L-shaped cluster, a couple of nearby marbles, and one open hole, yet no legal jump fits the line exactly. Once the pieces are arranged that loosely, the problem usually can't be repaired from within the position. In practical terms, the recovery happened several moves earlier, not at the moment you noticed the dead end.
A good backtracking habit is to revisit the last point where the board still had two plausible capture paths. If one move pulled too much material away from the center, try the alternate route that kept the cluster tighter. If a corner emptied too early, look for the choice that delayed that opening by one move. The game often turns on those small differences, not on any single dramatic mistake.
Practical takeaway: if a position looks sparse and disconnected, the fix is usually earlier in the sequence, not on the current board.
The most useful mindset is to treat failures as map reading. Each dead end teaches you what shape the board should not have had. Over time, you'll start spotting those danger patterns before they harden into a loss, especially the lonely edge marble and the too-thin center. That's when the puzzle stops feeling random and starts feeling readable.
If you want more clear, no-nonsense guidance on classic solitaire play, visit Play Solitaire Gaming. You'll find easy-to-follow game guides, quick ways to compare solitaire variants, and a clean place to keep sharpening the same planning skills that make marble solitaire finally click.
Ready to play?